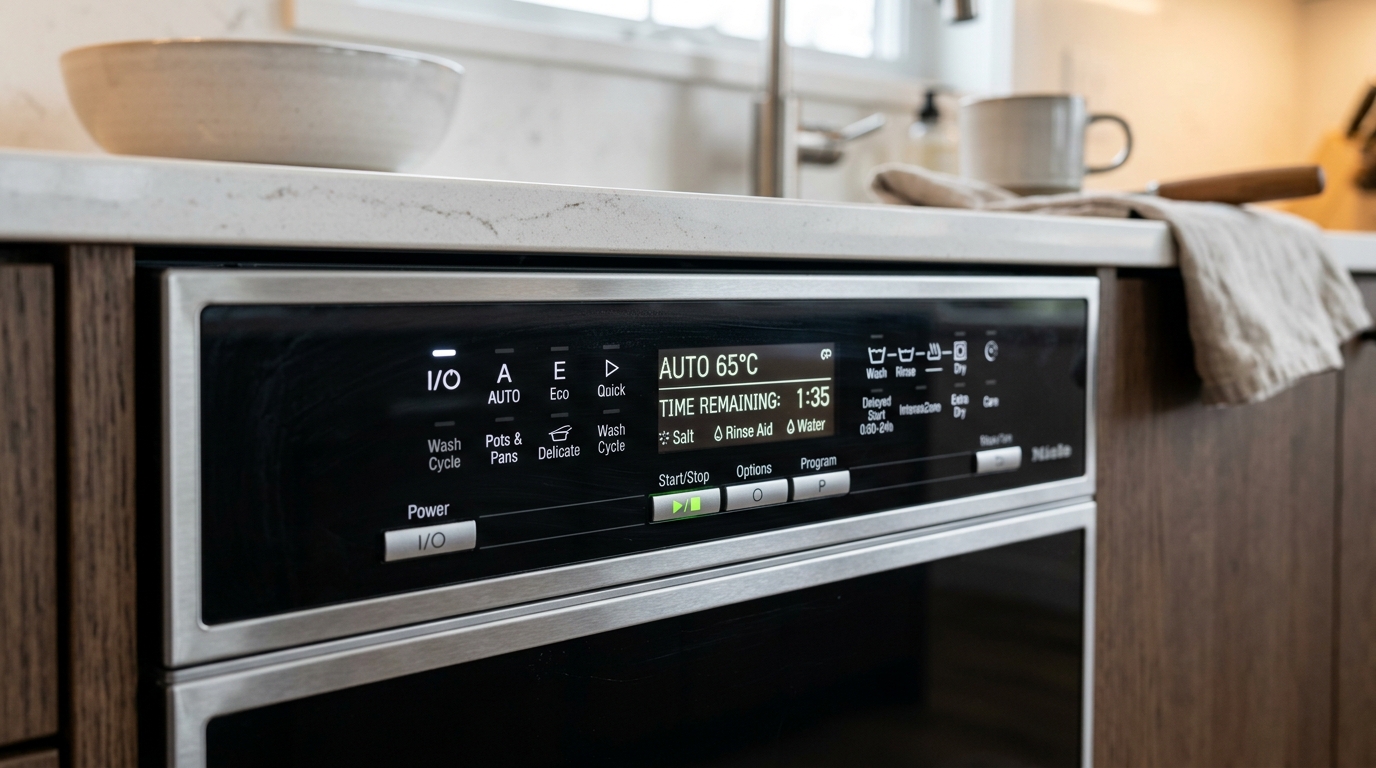
GE Dishwasher FTD Error Code: Step-by-Step Fix
Required Tools for this Fix
- Flathead screwdriver
- Shallow pan
- Bucket
Quick Summary Answer: The GE dishwasher error code FTD stands for “Failure To Drain,” indicating the control board detected standing water in the tub after running the drain pump for its maximum allotted time. This issue is most commonly caused by a clogged lower filter assembly, a blocked garbage disposal inlet, a kinked drain hose, or debris jamming the drain pump impeller. You can clear this error by cleaning the internal sump filters, verifying the drain hose is clear, and removing obstructions from the drain pump impeller.
The FTD error code on a GE dishwasher stops your wash cycle mid-way and leaves dirty water pooled at the bottom of the tub. Our field technicians encounter this specific code weekly, and in most cases, you can fix it without buying expensive replacement parts.
When your GE dishwasher displays FTD, the electronic control board has attempted to pump out water but registered that the water level did not drop fast enough. The system triggers this protective error to prevent dirty water from overflowing onto your kitchen floor.
We created this comprehensive diagnostic guide to walk you through troubleshooting every mechanical and electrical point of failure in your GE dishwasher’s drainage path.
SAFETY WARNING: Always disconnect the electrical power to your dishwasher before attempting any physical inspections or repairs. Unplug the unit from its wall outlet or turn off the dedicated breaker in your home’s electrical panel. Additionally, shut off the hot water supply valve under your kitchen sink before removing any plumbing connections.
GE Dishwasher FTD Diagnostic Overview
This table breaks down the key diagnostic procedures, estimated completion times, required tools, and typical costs involved in clearing the FTD code.
| Diagnostic Step | Est. Time | Tools Needed | Est. Cost |
|---|---|---|---|
| 1. Filter & Sump Cleaning | 15 Mins | Soft brush, warm water, sponge | $0 |
| 2. Air Gap / Disposal Inspection | 10 Mins | Screwdriver, pliers, wire coat hanger | $0 |
| 3. Drain Hose Verification | 20 Mins | Bucket, pliers, flash light | $0 - $15 |
| 4. Check Valve Inspection | 20 Mins | Needle-nose pliers, screwdriver | $0 - $12 |
| 5. Drain Pump Impeller Clearing | 30 Mins | Torx T15 driver, shop vacuum, towels | $0 |
| 6. Drain Pump Resistance Testing | 30 Mins | Digital Multimeter, socket set | $0 - $55 |
| 7. Pressure Sensor / Flood Switch | 25 Mins | Multimeter, putty knife | $0 - $35 |
Step-by-Step Diagnostic Testing Checklist
Use this quick checklist to track your diagnostic progress as you move through the repair steps below:
- Check 1: Confirm the garbage disposal knockout plug was removed (if newly installed).
- Check 2: Inspect and clean the Ultra-Fine and Fine Mesh filters inside the tub floor.
- Check 3: Inspect the air gap unit on top of the sink or the high-loop under the counter.
- Check 4: Disconnect and flush the corrugated drain hose into a bucket.
- Check 5: Inspect the rubber check valve flapper for debris or hardening.
- Check 6: Check the drain pump impeller for string, glass, or food particles.
- Check 7: Test the drain pump motor windings for electrical continuity using a multimeter.
- Check 8: Inspect the pressure sensor switch assembly for sediment build-up.
Understanding How GE Detects the FTD Error
Modern GE dishwashers rely on precise timing and physical sensors to monitor water evacuation. When a drain cycle begins, the main control board supplies 120V AC (or variable DC voltage depending on your model) to the drain pump motor.
The control board expects the tub to empty within a pre-programmed window, typically between 120 and 240 seconds. The machine monitors water presence using either a pressure sensor, a pressure transducer integrated into the flood switch, or optical turbidity sensors.
If the sensor still detects water when the timer expires, the control board halts the current cycle. It activates the drain pump one more time briefly before locking out functionality and flashing the FTD code on the front display or status LED panel.
[Control Board Activates Drain Pump]
                 │
                 ▼
     [Water Evacuation Begins]
                 │
                 ▼
   [Is Tub Empty Within 120-240s?]
       /                       \
     YES                        NO
     /                            \
[Continue Normal Cycle]     [Trigger FTD Code & Lock Out]
Step 1: Clean the Internal Filter Assembly and Sump Basin
Food soil, paper labels, and grease quickly accumulate in the bottom of your GE dishwasher. A clogged filter restricts water from reaching the suction side of the drain pump, causing the unit to register an FTD fault.
Removing the Fine and Coarse Filters
Open the dishwasher door and remove the lower rack entirely. Locate the circular filter module at the bottom center of the stainless steel or plastic tub.
Rotate the upper cylindrical filter counterclockwise about a quarter-turn to unlock it. Pull the filter assembly straight up to dislodge it from the sump basin.
      [Filter Cylinder]
             │
             │ Rotate Counterclockwise
             ▼
      [Lift Straight Up]
             │
             ▼
     [Expose Sump Basin]
Cleaning Debris from the Sump
Inspect the fine mesh screen sitting on the tub floor beneath the main cylinder. Lift this screen out and take both filter components to your kitchen sink.
Scrub the mesh screens gently with warm water, dish soap, and a soft nylon brush. Never use wire brushes or harsh chemical cleaners, as these can tear the micro-mesh material.
Use a flashlight to look into the open sump basin beneath where the filters sat. Sponge out any standing water and remove trapped glass, toothpicks, or bone fragments using needle-nose pliers.
Step 2: Inspect the Garbage Disposal and Sink Drain Connections
If your dishwasher drains into a garbage disposal or a sink branch tailpiece, an obstruction at this connection point will trigger the FTD code. This is the single most common cause of FTD errors on newly installed dishwashers or disposals.
Checking the Disposal Knockout Plug
Has a new garbage disposal been installed in your kitchen recently? All new disposals come with a hard plastic internal plug inside the dishwasher inlet nipple.
If the installer forgot to knock this plug out before connecting the hose, water cannot drain from the dishwasher. Disconnect the rubber drain hose from the disposal nipple.
Insert a screwdriver into the nipple to verify the passage is completely open. If you hit a solid plastic wall, tap the plug through into the disposal chamber using a screwdriver and hammer, then retrieve the plastic disk from inside the disposal.
  [Dishwasher Hose] ---> [Disposal Nipple]
                              │
                    [Check Internal Plug]
                     /                 \
            [Plug Present]        [Plug Removed]
                  │                      │
       (Knock out with punch)     (Path Clear)
Clearing the Air Gap Unit
If your plumbing setup includes a countertop air gap device, pry off its chrome decorative cap. Unscrew or unclip the plastic top cap to reveal the inner channels.
Inspect the air gap for packed food waste or mineral deposits. Push a flexible brush or bent wire coat hanger down through the air gap legs to push any blockages out into the sink drain.
Step 3: Inspect and Flush the Drain Hose
A pinched, kinked, or clogged corrugated drain hose severely restricts flow rate, forcing the drain pump to work against excessive head pressure.
Inspecting Hose Geometry
Slide the dishwasher out from under the cabinet slightly to view the drain hose path. Ensure the hose has no tight turns, flat pinches, or heavy objects resting on top of it.
Verify that your drain hose utilizes a proper “high loop.” The hose must route up to the underside of the countertop (at least 32 inches above the floor) before looping down to the sink drain or disposal. This high loop prevents dirty sink water from siphoning back into your dishwasher tub.
Countertop Level ────────────────────────── (High Loop Peak: 32"+)
                                 / \
                                /   \
                               /     \
Dishwasher Exit ──────────────┘       └───> Sink Drain / Disposal
Manual Flushing Procedure
Place a wide, shallow bucket on the floor next to the dishwasher exit point. Clamp off the drain hose using a hose clamp or gentle locking pliers to prevent premature spills.
Disconnect the hose from the sink drain or disposal nipple. Direct the open end of the hose down into your bucket and release the clamp.
If water fails to flow freely under gravity, clear the line using low-pressure water or compressed air. You can attach a utility garden hose to one end to flush out stubborn fat deposits and debris.
Step 4: Test and Clean the Drain Check Valve
GE dishwashers use a small rubber check valve or flapper to prevent pumped water from flowing back into the tub once the pump stops. When this valve becomes hard, deformed, or jammed open with food waste, dirty water flows straight back into the sump, triggering an FTD error on the next cycle check.
Locating the Check Valve
On most GE models, the check valve sits either directly at the discharge port of the drain pump or at the base of the sump where the drain hose connects.
Consult your manual or look beneath the sump housing. Unthread the retaining collar or pull the rubber elbow off the plastic port.
[Sump Housing] ---> [Check Valve Flapper] ---> [Drain Hose]
                           │
                 (Inspect for Stiffness)
Cleaning and Testing the Flapper
Remove the flexible rubber check valve. Inspect the rubber surface for tears, physical deformities, or hard mineral crusting.
The rubber valve should form a tight seal in one direction while opening easily under light pressure in the other direction. Wash the valve thoroughly under warm tap water.
If the rubber feels brittle, cracked, or stretched out of shape, replace it immediately. A degraded check valve allows wastewater backwashing, which reliably reproduces the FTD error code.
Step 5: Inspect the Drain Pump Impeller for Mechanical Jams
The drain pump uses a high-speed rotating plastic impeller to propel water through the discharge line. Foreign items like broken glass, fruit seeds, or twist ties can bypass the filters and lock the impeller blades in place.
Accessing the Drain Pump
Pull the dishwasher completely out of its cabinet enclosure after disconnecting power and water. Lay a thick blanket or towel on the floor and carefully tilt the dishwasher onto its back.
Locate the drain pump assembly mounted underneath the plastic or stainless sump basin. The drain pump is typically smaller than the main wash pump and connects directly to the corrugated drain hose.
[Main Sump Assembly]
        │
        ├───> [Wash Pump Motor] (Larger)
        │
        └───> [Drain Pump Motor] (Smaller, directly tied to drain hose)
Inspecting the Impeller Chamber
Disconnect the wire harness plug attached to the drain pump. Depending on your specific GE model, the pump secures to the sump using two or three Torx T15 screws, or a twist-lock bayonet mechanism.
Remove the mounting screws or press the plastic release tab while twisting the pump body counterclockwise to detach it. Look inside the exposed impeller cavity using a bright light source.
Spin the plastic impeller blades gently with your finger. The motor shaft should rotate with a slight magnetic resistance every 180 degrees, but it must turn freely without binding, grinding, or sticking.
Use a pair of thin tweezers to clear out any thread, hair, or glass fragments wrapped tightly around the impeller shaft. Reassemble the pump and test for smooth rotation.
[Pump Housing] ──> [Inspect Impeller] ──> [Remove Debris with Tweezers] ──> [Verify Smooth Rotation]
Step 6: Test the Drain Pump Motor with a Multimeter
If the impeller spins freely and no blockages exist in the drain lines, the electrical windings inside the drain pump motor may have suffered an open circuit or internal short.
Setting Up Your Digital Multimeter
Turn your digital multimeter dial to the Resistance (Ohms, represented by the $\Omega$ symbol) setting. Set the range scale to $R \times 1$ or auto-ranging mode.
Ensure the dishwasher electrical power is completely disconnected. Remove the two-wire harness plug from the drain pump terminals.
[Multimeter] ─── (Set to $\Omega$ Ohms)
      │
      ├── Red Probe   ───> Terminal A
      └── Black Probe ───> Terminal B
Measuring Windings Resistance
Touch one multimeter probe to Terminal A and the second probe to Terminal B on the drain pump motor header.
Compare your reading against standard GE technical specifications:
- Standard 120V AC Drain Pumps: Resistance should read between 15 Ohms and 40 Ohms.
- Direct Current (DC) Drain Pumps: Resistance should read between 10 Ohms and 25 Ohms.
If your multimeter displays “OL” (Open Loop) or infinite resistance, the motor’s internal copper coil has burned out. If the meter displays near zero Ohms (less than 2 Ohms), the windings have shorted together. In either scenario, you must replace the drain pump assembly.
        Multimeter Resistance Reading Guide
┌──────────────────────┬───────────────────────────────┐
│ Measured Value       │ Component Condition           │
├──────────────────────┼───────────────────────────────┤
│ 15 $\Omega$ - 40 $\Omega$             │ Normal / Functional           │
│ Infinite / "OL"      │ Open Circuit (Blown Coil)     │
│ 0 $\Omega$ - 2 $\Omega$               │ Short Circuit (Failed Motor)  │
└──────────────────────┴───────────────────────────────┘
Checking Ground Continuity
Touch one probe to a clean metal terminal pin and the second probe to the bare metal frame or ground pin of the pump motor.
The meter must read “OL” (infinite resistance). If you register continuity to ground, the pump motor has an internal ground fault and will trip your home’s GFCI breaker or trigger control board faults.
Step 7: Inspect the Pressure Switch / Flood Sensor Assembly
GE dishwashers determine tub water levels using a pressure switch or an electronic flood switch module mounted in the tub base. If this sensor becomes fouled with food grease or scale, it misreports water presence to the main board, causing an FTD error even if the tub is physically bone dry.
Locating the Flood Switch
The flood switch sits inside the bottom tub basin, usually near the front right or front left side. It consists of a plastic stem protruding upward, often containing an internal float or a solid-state pressure transducer inside its base.
[Tub Interior Floor]
        │
        └───> [Flood Switch Stem / Pressure Transducer]
                    │
              (Check for Grease/Scale)
Cleaning and Testing the Sensor
Reach into the tub and inspect the base of the switch module. Food particulate, liquid soap scum, and hard mineral deposits frequently choke the sensing chamber.
Wipe down the switch assembly with a soft cloth soaked in warm white vinegar. If your model uses a mechanical float switch, lift the plastic stem up and down by hand; you should hear a crisp, distinct mechanical click as the microswitch actuates.
If the switch stem sticks or fails to click, unclip the sensor from underneath the tub. Use your multimeter set to Continuity mode to test the microswitch terminals:
- With the float resting at the bottom, the switch should show Continuity (0 Ohms) across the Normally Closed (NC) contacts.
- Manually lift the float stem up; the circuit should open immediately (“OL” on your meter).
If the switch fails to change electrical state cleanly during this manual test, replace the pressure sensor/flood switch assembly.
[Float Rest Position]  ──> Continuity (0 $\Omega$)
[Float Raised Position] ──> Open Circuit ("OL")
Step 8: Inspect the Control Board and Wiring Harness
If you have thoroughly cleaned the drain paths, confirmed the drain pump motor functions properly, and verified the flood switch works, the final suspect is the main electronic control board or its connecting harness.
Visual Harness Inspection
Examine the wiring harness running from the lower drain pump up into the door panel or underlying control board housing. Look for pinched wires near the door hinges, melted insulation, or loose terminal pins.
Vibration during wash cycles can cause wire terminal plugs to back out of their plastic housings over time. Firmly press all terminal connectors into place at both the pump motor and the main control board header.
Main Control Board Diagnostic
The main control board houses solid-state relays that switch 120V power onto the drain pump circuit. Unplug the unit, access the main control board enclosure, and inspect the printed circuit board visually.
Look for burnt circuit traces, black soot marks around the relay components, or swollen electrolytic capacitors. If the control board fails to output voltage to the drain pump during a diagnostic drain cycle (despite receiving correct sensor signals), replace the main control board.
How to Reset the FTD Error Code on GE Dishwashers
Once you complete your mechanical repairs and clear any blockages, you must clear the stored FTD error code from the memory bank to restore normal operation.
Hard Power Reset Procedure
- Press the CANCEL/RESET button on the front control panel once to clear the active cycle status. Wait 60 seconds.
- Disconnect the main power at your home breaker panel or unplug the power cord under the sink.
- Leave the unit completely unpowered for 10 full minutes. This allows the high-voltage capacitors on the main control board to discharge entirely.
- Restore power to the dishwasher.
[Press Cancel/Reset] ──> [Disconnect Power 10 Mins] ──> [Restore Power] ──> [Run Test Cycle]
Entering GE Diagnostic Test Mode
On modern GE electronic dishwashers, you can verify your fix by entering the built-in field diagnostic mode:
- Ensure the unit is in Standby mode (display lights off).
- Press and hold the Cycle Select and Start buttons simultaneously for 5 seconds until all control LEDs light up.
- Press Cycle Select repeatedly to step through individual component test steps until you reach the Drain Pump Test.
- Press Start to run the drain pump manually for 60 seconds and confirm water evacuates completely without generating a new FTD code.
Preventative Maintenance to Prevent Future FTD Errors
Prevent future drain failures and keep your GE dishwasher operating smoothly by incorporating these simple maintenance habits:
- Perform Monthly Filter Cleanings: Remove and rinse the ultra-fine filter cylinder under hot running water every 30 days to prevent fat accumulation.
- Scrape Heavy Food Scrapings: Scrape solid food residue, rice, seeds, and bones into your trash bin before loading plates into the racks.
- Run Your Garbage Disposal: Always run your kitchen garbage disposal for 15 seconds with cold water running before starting your dishwasher to ensure the shared drain line is completely open.
- Execute Vinegar Maintenance Flushes: Once a month, place a glass bowl filled with two cups of white distilled vinegar on the top rack of an empty dishwasher and run a hot cycle. Vinegar dissolves grease deposits and calcium scale accumulating inside the drain lines and check valve.
- Verify Water Temperature: Ensure your kitchen sink hot water heater delivers water at a minimum of 120°F (49°C). Cold inlet water fails to dissolve animal fats properly, causing grease to solidify inside the drain pump housing.
Frequently Asked Questions (FAQ)
1. Can I run my GE dishwasher while the FTD code is actively displayed?
No, the dishwasher disables normal wash cycles while the FTD error code remains active in the system memory. The control board locks out heating elements and water fill valves to prevent flooding your kitchen. You must clear the underlying drainage issue and perform a power reset before running a new cycle.
2. Why does my GE dishwasher show FTD even when there is no standing water in the tub?
If the tub is physically dry but the display still shows FTD, you are experiencing a “false drain error.” This is typically caused by a dirty or failed flood switch/pressure sensor that tells the control board water is present when it isn’t. Cleaning grease deposits off the flood switch or replacing the sensor assembly will resolve a false FTD error.
3. How much does it cost to fix a GE dishwasher FTD code?
If the issue is caused by a clogged filter, kinked hose, or debris caught in the impeller, the repair costs $0 as a DIY job. If you need replacement parts, a new rubber check valve costs around $10 to $15, a flood sensor costs $25 to $40, and a replacement drain pump motor costs between $45 and $75. Hiring a professional appliance technician typically costs between $150 and $300 for labor and call-out fees.
4. Will a clogged air gap on my sink cause an FTD code?
Yes, a clogged sink air gap is one of the most common external causes of the FTD code. If food waste blocks the internal channels of the air gap device on top of your sink, water cannot pass through to the drain system. The resulting backpressure stops the dishwasher from evacuating water within the required time window, triggering the error.
5. How do I know if the drain pump motor itself has failed versus just being clogged?
A clogged drain pump usually makes a distinct low humming or buzzing sound as electrical current flows through the stalled motor. A mechanically failed or electronically burned-out pump motor will either make a harsh grinding noise (worn bearings) or remain completely silent during the drain cycle. You can definitively test the motor using a multimeter set to Ohms—a healthy pump coil measures between 15 and 40 Ohms.
Safety Precaution Notice
Before proceeding with any repair checklist: Always unplug the appliance from its electrical socket and turn off shutoff valves for incoming water (for washers and dishwashers). Discharge capacitors if working on motors.