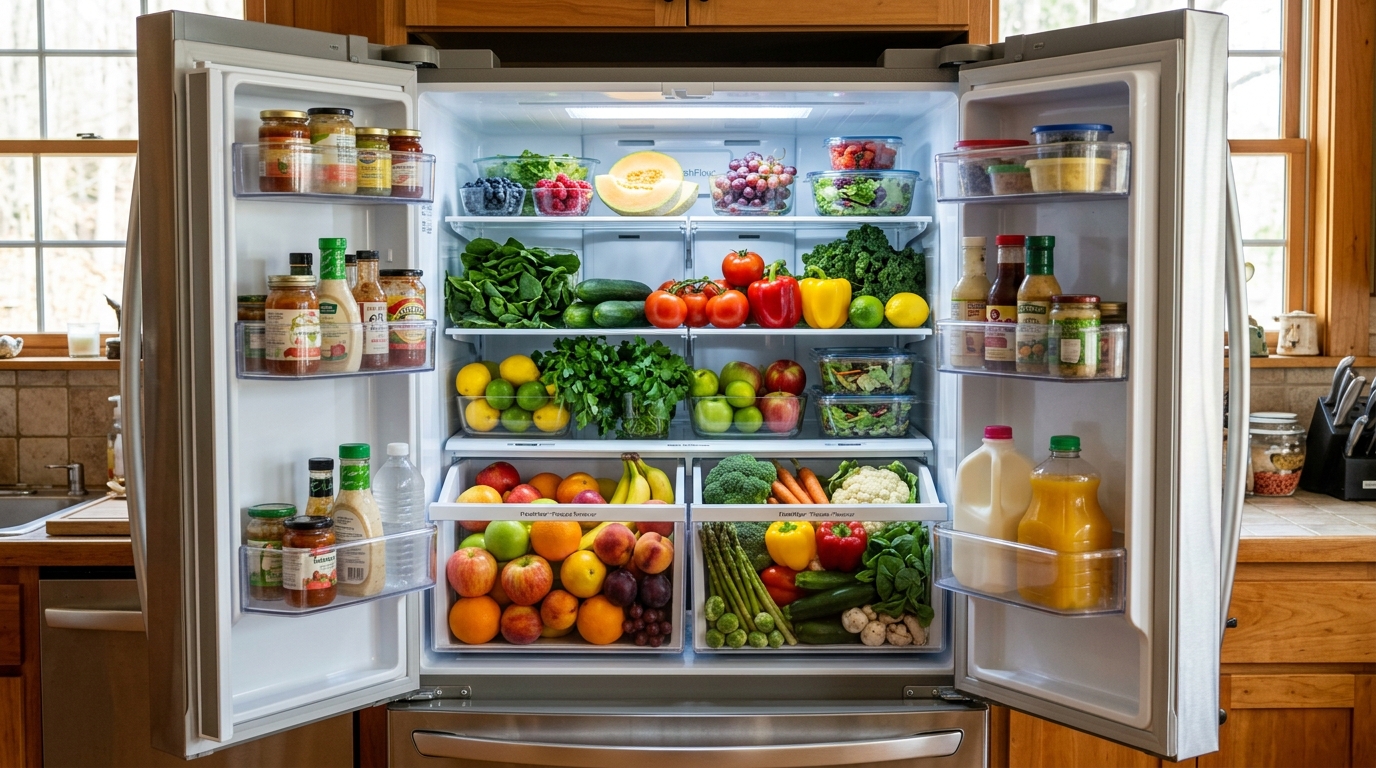
GE Refrigerator HRS Error Code: Step-by-Step Fix
Required Tools for this Fix
- Multimeter
- Nut driver
- Replacement heater
Quick Summary Answer: The GE refrigerator error code HRS indicates an open defrost heater circuit, meaning the main control board cannot detect continuity through the defrost heater loop. This fault is most commonly caused by a burnt-out defrost heating element, a tripped high-limit bimetal thermostat, an open thermal fuse, or a failed relay on the main electronic control board. You can fix this by testing the heater and safety thermostat for resistance with a multimeter and replacing whichever component shows infinite resistance (an open circuit).
Your GE refrigerator display is flashing “HRS”, your fresh food section is slowly warming up, and you might hear intermittent clicking from the back of the cabinet. We see this exact issue routinely on service calls across the country. When this code appears, your refrigerator has lost its ability to melt frost off the evaporator coils automatically.
Left unaddressed, ice will choke the cooling coils within two to four days. Airflow will drop to zero, your ice cream will melt, and your fresh groceries will spoil. Fortunately, you do not need to replace the entire refrigerator. By following our systematic diagnostic process, you can pinpoint the failed part with an inexpensive multimeter and complete the repair yourself.
WARNING: Electrical Shock Hazard
Always disconnect your refrigerator from its power source before touching wiring or handling internal components. Unplug the unit directly from the wall outlet or switch off the dedicated circuit breaker in your service panel. Never perform continuity checks on live electrical circuits.
GE HRS Error Code: Repair Summary Matrix
| Diagnostic Step | Est. Time | Tools Needed | Est. DIY Cost |
|---|---|---|---|
| 1. Hard System Reset | 10 mins | None | $0 |
| 2. Control Board Continuity Test | 15 mins | 1/4” nut driver, Multimeter | $0 |
| 3. Freezer Panel Disassembly | 20 mins | 1/4” nut driver, Putty knife, Work gloves | $0 |
| 4. Defrost Heater Resistance Test | 10 mins | Multimeter, Wire strippers (optional) | $35 - $80 (if replaced) |
| 5. Bimetal / Thermal Fuse Test | 10 mins | Multimeter, Ice bath / Freeze spray | $15 - $45 (if replaced) |
| 6. Main Control Board Replacement | 25 mins | 1/4” nut driver, Phillips screwdriver | $90 - $180 (if replaced) |
What Does the GE “HRS” Error Code Mean?
Modern GE electronic refrigerators constantly monitor the resistance of internal sub-circuits. The defrost loop contains three components wired in series: the defrost heater, the defrost bimetal thermostat (or high-limit thermal fuse), and the wiring harness leading back to the control board.
When the main board initiates a defrost cycle—or runs its automatic diagnostic self-test—it sends voltage through this circuit. If the circuit is unbroken, electricity passes through the heater, generating heat to clear frost from the evaporator coils.
[Main Control Board]
       │
       ▼ (120V AC Output)
[High-Limit Bimetal / Thermal Fuse]
       │
       ▼ (Closed Circuit)
[Defrost Heating Element]
       │
       ▼ (Neutral Return)
[Main Control Board]
The “HRS” code triggers when the control board detects an open loop (infinite ohms / zero current draw) across the circuit terminals. Because the pathway is severed, current cannot flow. The board senses that the heater cannot run, locks in the error code, and alerts you via the display panel.
Common Symptoms Accompanying Code HRS
- Evaporator Frost Over: A thick, snowy buildup covers the back wall of the freezer compartment.
- Warming Fresh Food Section: As ice blocks the evaporator fins, the evaporator fan cannot push cold air into the refrigerator side.
- Constant Compressor Run Time: The compressor runs non-stop trying to pull the cabinet temperature down to setpoint.
- Clicking Sounds at the Rear: The defrost relay on the main control board attempts to close, clicks, and drops out when no load is detected.
Tools and Materials Required
Before starting, gather the basic diagnostic tools listed below. Having everything within reach makes the troubleshooting process smooth and safe.
- Digital Multimeter: Capable of reading ohms (resistance) and AC voltage.
- 1/4-inch Nut Driver: Standard size for GE rear panel and evaporator cover sheet metal screws.
- 5/16-inch Nut Driver: Used on some compressor bay panels and ground lugs.
- Flathead Screwdriver or Rigid Putty Knife: Helpful for releasing plastic harness clips.
- Work Gloves: Evaporator fins are razor sharp and cause deep cuts easily.
- Handheld Hair Dryer or Clothes Steamer: Useful for melting ice buildup covering the components.
- Towel and Shop Vacuum: To catch water runoff during manual evaporator defrosting.
Diagnostic Checklist: Step-by-Step Troubleshooting
Follow this checklist in order. We start with the simplest, least invasive tests at the back of the refrigerator before taking apart the interior of your freezer.
[Start Diagnostic]
       │
       ▼
[Step 1: Perform Hard Reset] ──(Fixed?)──► [Done]
       │ (No)
       ▼
[Step 2: Test Circuit at Main Board]
       │
       ├─► (Infinite Ohms / Open) ──► [Go to Step 3: Freezer Disassembly]
       │
       └─► (Proper Resistance: 20-50 Ohms) ──► [Replace Main Control Board]
                                                       │
                                                       ▼
[Step 3: Freezer Disassembly & Visual Check]
       │
       ▼
[Step 4: Test Defrost Heater Directly]
       │
       ├─► (Open / Infinite Ohms) ──► [Replace Defrost Heater]
       │
       └─► (Normal Resistance) ──► [Go to Step 5]
                                           │
                                           ▼
[Step 5: Test Bimetal Thermostat & Thermal Fuse]
       │
       ├─► (Open Circuit While Cold) ──► [Replace Bimetal / Fuse]
       │
       └─► (Good Continuity) ──► [Repair Damaged Cabinet Wiring Harness]
Step 1: Perform a Hard System Reset
Occasionally, electrical noise, a momentary power surge, or a brownout can cause the microprocessor on the control board to crash. When this happens, it can misread circuit resistance and post a false HRS code.
- Unplug the refrigerator power cord from the wall outlet.
- Leave the unit completely unpowered for a full 10 minutes. This allows the high-voltage capacitors on the main control board to drain.
- Plug the power cord back into the wall.
- Check the display panel.
If the code disappears and normal cooling resumes, monitor the unit over the next 48 hours. If the HRS code returns immediately or reappears within two days, you have a hard component failure. Proceed to Step 2.
Step 2: The Fast Main Board Continuity Test
Smart technicians avoid tearing apart the freezer interior until they confirm the issue from the rear access panel. You can test the complete defrost circuit directly from the main control board in less than five minutes.
Locating the Board
Pull the refrigerator away from the wall. Remove the galvanized sheet metal cover plate on the rear panel using your 1/4-inch nut driver. Behind this cover sits the main electronic control board.
+-------------------------------------------------------------+
|                     GE MAIN CONTROL BOARD                   |
|                                                             |
|   [J1]        [J2]        [J3]        [J4]        [J7]      |
|   oooo        oooo        oooo        oooo        oooo      |
|                                                             |
|                                        [RELAYS]             |
|                                         +-----+   +-----+   |
|   [J9]                                  |     |   |     |   |
|   o Pin 1 (Defrost Line L1)             +-----+   +-----+   |
|   o                                                         |
|   o                                    [J11]                |
|   o                                    o Pin 1 (Heater)     |
|   o                                    o                    |
|   o Pin 9 (Line Input)                 o Pin 3 (Neutral)    |
+-------------------------------------------------------------+
Running the Meter Test
- Make sure the refrigerator remains unplugged from the wall.
- Locate the main wiring harnesses plugged into the board. On most GE models (such as Arctica, Profile, and standard bottom-mount or side-by-side units), the defrost circuit runs through connector J9 or J11.
- Inspect the board schematic attached to the back panel or paper tech sheet folded inside the hinge cover. Identify the defrost output pin (often labeled
DEFROSTorHEATER) and the system AC Neutral line. - Carefully unplug the wiring harness connector from the board.
- Set your multimeter to the lowest Ohms ($\Omega$) scale or Auto-Ranging Resistance mode.
- Insert one meter probe into the defrost heater wire terminal on the plastic plug. Place the second probe on the AC Neutral terminal pin.
Interpreting Your Reading
- Reading is between 20 and 50 Ohms: The defrost heater, bimetal thermostat, thermal fuse, and harness inside the freezer are intact. This means your defrost loop is physically sound, but the relay or sensing circuit on the main control board has failed. Replace the main board.
- Reading shows “O.L.”, “1”, or Infinite Resistance: The circuit is open. One of the components inside the freezer has blown, or a wire has broken. Proceed directly to Step 3.
Step 3: Freezer Disassembly and Evaporator Access
Because your test showed an open circuit, you must now get eyes and meter leads on the components mounted inside the freezer compartment.
Removing Drawers and Shelves
- Empty the freezer contents into an insulated cooler with ice packs.
- Pull out the sliding baskets, ice storage bins, and glass shelves.
- On bottom-freezer models, remove the front drawer door by removing the two 1/4-inch screws securing the drawer glides on each side, then lift the door assembly out of the track.
Taking Down the Evaporator Cover
- Locate the mounting screws on the sheet metal back wall inside the freezer. These screws sit around the perimeter and near the bottom air duct.
- Remove all retaining screws with your 1/4-inch nut driver.
- If an ice maker is installed on the side or back, remove its mounting bracket screws and disconnect its wire harness to gain working clearance.
- Gently pull the top edge of the back panel forward and downward. Be careful with the fan motor harness attached behind the panel; disconnect the plug before pulling the panel fully out.
+--------------------------------------------------+
|               FREEZER BACK WALL                  |
|                                                  |
|     +--------------------------------------+     |
|     |       Bimetal Thermostat (Clipped)   |     |
|     |               [ (O) ]                |     |
|     +------------------|-------------------+     |
|                        |                         |
|             |||||||||||||||||||||                |
|             |  Evaporator Coil  |                |
|             |||||||||||||||||||||                |
|                        |                         |
|     +------------------|-------------------+     |
|     |  [=================================] |     |
|     |     Defrost Heater (Under Coil)      |     |
|     +--------------------------------------+     |
|                     [Drain Pan]                  |
+--------------------------------------------------+
Clearing Frost Blockages
If the back panel is frozen solid to the coils, do not pull with excessive force. Doing so will tear the aluminum evaporator tubing, puncturing the sealed refrigeration system and ruining the appliance.
Use a garment steamer or hair dryer on medium heat to melt the frost around the panel edges. Collect running water with towels tucked into the bottom pan. Once clear, remove the panel and examine the components.
Step 4: Testing the Defrost Heater
GE has used two primary heater designs over the years: single/dual quartz glass tubes nested under the coil, or an aluminum-sheathed calrod element snaked through the bottom fins.
Quartz Glass Style:
[Wire Lead] ===[ Glass Tube / Internal Coil ]===[ Metal Guard ]===[ Wire Lead ]

Calrod Metal Style:
[Wire Lead] ───( U-Shaped Aluminum Sheath Element )─── [Wire Lead]
- Locate the two wire ends connected to the heating element at the base of the evaporator coil.
- Trace the wires to their quick-disconnect spade or plastic terminals. Disconnect both sides to isolate the heater from the rest of the electrical system.
- Set your multimeter to the Ohms ($\Omega$) setting.
- Place one test lead on each heater terminal.
Evaluation
- Normal Reading (Calrod style): 20 to 35 Ohms.
- Normal Reading (Dual glass tube style): 40 to 55 Ohms.
- Defective Reading: If the meter reads “O.L.” (open loop) or infinite resistance, the heating filament inside the element has broken.
- Visual Check: On quartz elements, look closely for black scorching or cracked glass. On calrod elements, look for blistering, bulging, or split metal sheaths. Replace the element if any of these signs appear.
Step 5: Testing the Defrost Bimetal Thermostat and Thermal Fuse
If your defrost heater showed good resistance during Step 4, the open circuit is caused by a safety device wired in series with the heater.
Normal Operation Curve:
Below 32°F - 38°F: Bimetal Contacts CLOSED (Continuity: 0.0 - 0.5 Ohms)
Above 50°F - 60°F: Bimetal Contacts OPEN   (Continuity: Infinite / O.L.)
The defrost bimetal is a small circular metal disc inside a plastic cap, clipped directly to the top copper tubing of the evaporator. Its job is to sense coil temperature. When the coil gets warm enough to melt all the ice (around 50°F), the bimetal snaps open to cut off power, preventing fire hazards.
Testing the Bimetal
- Disconnect the bimetal leads from the harness.
- The bimetal only closes its contacts when cold (below roughly 32°F to 38°F depending on the model). If the evaporator is already packed with ice, the bimetal should read closed (0 ohms).
- If the evaporator has already thawed to room temperature, you must chill the bimetal. Place the component into a cup of ice water mixed with salt, or blast it with freeze spray until its case drops below 30°F.
- Touch your multimeter leads to the bimetal wires.
- If the reading remains “O.L.” while the component is freezing cold, the internal switch contacts are bad. Replace the bimetal thermostat.
Testing the In-Line Thermal Fuse
Some GE models equip the evaporator harness with an encapsulated one-time thermal cutoff fuse in addition to or in place of a standard bimetal.
- Locate the fuse barrel spliced into the harness tubing.
- Touch your meter leads to either side of the fuse.
- This safety device should always show continuity (under 1 Ohm) regardless of temperature. If it reads open, the fuse has blown due to an earlier over-temperature event and you must replace the harness assembly.
Component Replacement Procedures
Once you discover the broken link in your defrost circuit, follow these replacement directions.
Replacing a Burnt Defrost Heater
- Unhook the wire leads connecting the old heater to the cabinet harness.
- Remove the sheet metal retaining clips or mounting brackets securing the heater beneath the evaporator coil.
- Lower the drip shield located right under the coils.
- Carefully ease the old element out of the evaporator support brackets. Be cautious not to kink or bend the delicate aluminum refrigerant lines above it.
- Slide the replacement heater into position. Re-engage the factory clips to make sure the element does not contact plastic liner walls.
- Plug the wire harnesses tightly back into place.
Replacing the Bimetal Thermostat
- Unclip the defective bimetal from the evaporator suction pipe.
- Cut the factory wires roughly two inches back from the old thermostat body.
- Strip 1/2-inch of insulation from the cabinet wires and the new bimetal wires.
- Join the wires using heat-shrink butt connectors filled with silicone sealant. Because the freezer runs in a high-moisture environment, standard twist-on wire nuts will corrode within months.
- Shrink the tubing evenly with a heat gun to create an airtight, waterproof seal.
- Snap the new bimetal firmly onto the copper tubing in the exact factory position.
   [Cabinet Wire] =======[ Solderless Splice ]======= [Bimetal Wire]
                              |               |
                              +---Heatshrink--+
                                  (Waterproof)
Replacing the Main Electronic Control Board
If all defrost parts in the freezer pass their resistance checks, the main control board relay has burned out internally.
- Keep the unit completely unplugged.
- Move to the rear board compartment opened during Step 2.
- Take a clear smartphone photo of all wire harnesses plugged into the board to reference connection points later.
- Disengage the wire harnesses by depressing their locking tabs and pulling the plastic connectors straight off.
- Use needle-nose pliers or your nut driver to release the board from its plastic mounting standoffs.
- Snap the new circuit board into the bracket standoffs.
- Reconnect every harness plug securely, referencing your photo.
- Reinstall the sheet metal cover plate to maintain electrical and fire safety shielding.
Post-Repair Verification & Diagnostic Mode
After you complete your repairs, reassemble the freezer paneling and internal storage components. Plug the power cord back into the wall outlet. Now you need to confirm that the board senses the repaired circuit and that the heater operates.
Display Panel Diagnostic Entry (Standard GE Electronic Touch Panels):
Press and Hold: [FREEZER WARMER] + [FREEZER COLDER] + [FRESH FOOD WARMER] + [FRESH FOOD COLDER]
                                    - OR -
Press and Hold: [EXPRESS CHAW / WATER FILTER RESET] for 3 seconds.
Clearing the Code and Running Forced Defrost
- On many GE side-by-side or French-door units, entering the diagnostic mode allows you to force a defrost cycle manually.
- Consult your unit’s mini-manual to trigger the Forced Defrost Test (typically Test Mode
0 1or1 4depending on the platform architecture). - Once engaged, listen near the freezer evaporator. Within 3 to 5 minutes, you should hear the distinct sound of ice sizzling and dripping onto the hot heating element below the coils.
- Exit the diagnostic test mode or power cycle the refrigerator once more to clear saved error codes from the board memory.
- The “HRS” readout should disappear, replaced by the target compartment temperature settings.
Preventive Maintenance to Avoid Repeat Failures
After clearing the HRS code, take simple preventative actions to keep your cooling and defrost systems operating efficiently:
- Vacuum the Condenser Coils: Dust-choked condenser coils under the refrigerator drive head pressures high and cause internal cabinet electronics to run hot. Clean them every six months with a coil brush and vacuum.
- Inspect the Freezer Door Gasket: Check that the perimeter rubber seal contacts the cabinet face firmly. Air leaks allow humid room air to enter continuously, forming frost faster than the defrost heater can melt it.
- Clear the Evaporator Drain Hole: Whenever you access the evaporator, pour a cup of hot water down the drain trough underneath the coil. Ensure it empties quickly into the drain pan below the compressor bay to avoid ice damming.
Frequently Asked Questions (FAQ)
Can I run my GE refrigerator while the HRS error code is on?
You can run it temporarily, but cooling will steadily degrade. Because the automatic defrost system is disabled, frost will continue accumulating over the coils until all airflow stops completely within a few days. We suggest addressing the repair as soon as the code appears to prevent food loss and compressor strain.
What is the normal resistance of a GE defrost heater?
A healthy GE calrod metal heating element typically reads between 20 and 35 Ohms on a digital multimeter. Models using quartz glass tube heating elements generally register between 40 and 55 Ohms. If your multimeter displays “O.L.” or infinite resistance, the internal heating filament is broken and the heater must be replaced.
Why does my bimetal thermostat show an open circuit during testing?
The defrost bimetal thermostat is designed to remain open at room temperature. It only snaps shut to provide continuity when its temperature drops below roughly 32°F to 38°F. To test it accurately, you must chill the component in an ice-water bath or with freeze spray before measuring resistance with your meter.
How do I clear the HRS code after fixing the broken part?
After replacing the damaged component, you can clear the error code by executing a hard reset. Disconnect the refrigerator from wall power for 10 minutes, then plug it back in. You can also clear stored codes by entering and exiting the diagnostic mode via the front dispenser interface buttons.
Can a faulty main control board cause the HRS code if the heater is good?
Yes. The defrost circuit completes its path directly through relays and sensing traces on the main control board. If the board’s internal defrost relay contacts burn out or the sensing circuit fails, the board cannot measure current flow. When this happens, it will show the HRS code even if the heater, bimetal, and wiring inside the freezer are in perfect working order.
Safety Precaution Notice
Before proceeding with any repair checklist: Always unplug the appliance from its electrical socket and turn off shutoff valves for incoming water (for washers and dishwashers). Discharge capacitors if working on motors.